Ovix WordPress Theme
Digital Agency & Portfolio WordPress Theme
Install WordPress
To get this theme you must have WordPress already installed. If you need help installing WordPress, follow the instructions in WordPress Codex. Below are some useful links on WordPress information:
- WordPress Codex – general information about WordPress and how to install it on your server.
- First Steps With WordPress – general information included a wide variety of topics.
- FAQ New To WordPress – most Frequently Asked Questions regarding WordPress.
Install theme
When purchasing Ovix theme from Themeforest, you will be able to download Ovix files from your Themeforest account. The main_files contains all files, you have to find ovix.zip and upload it on your directory.
Install Ovix theme via WordPress.
- Unzip the downloaded package from Themeforest and inside it find the file ovix.zip
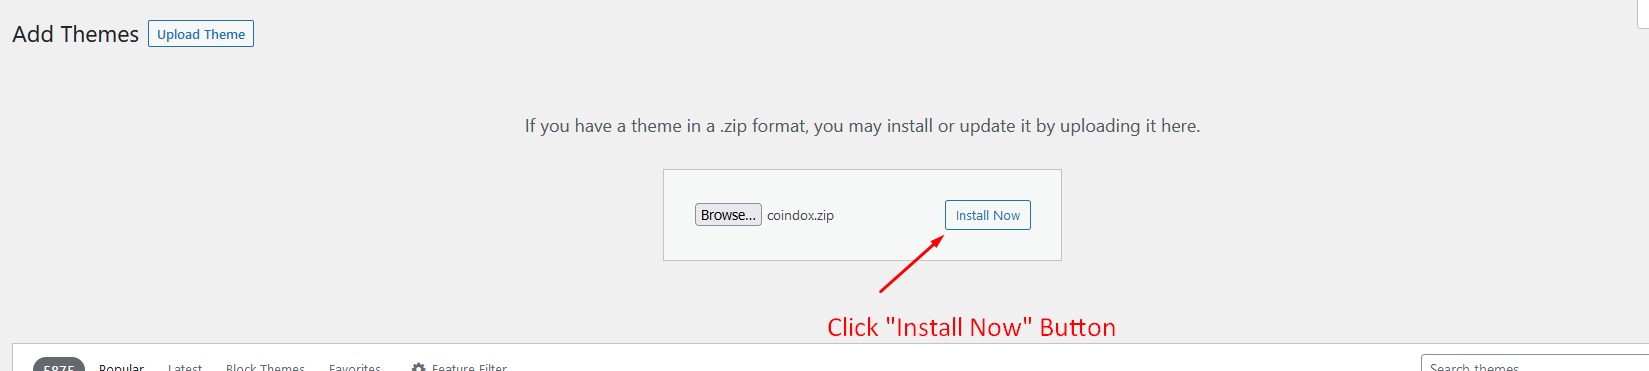
- Login to your WordPress dashboard, go to Appearance > Themes > Add New > Upload Theme and click Choose File Button.
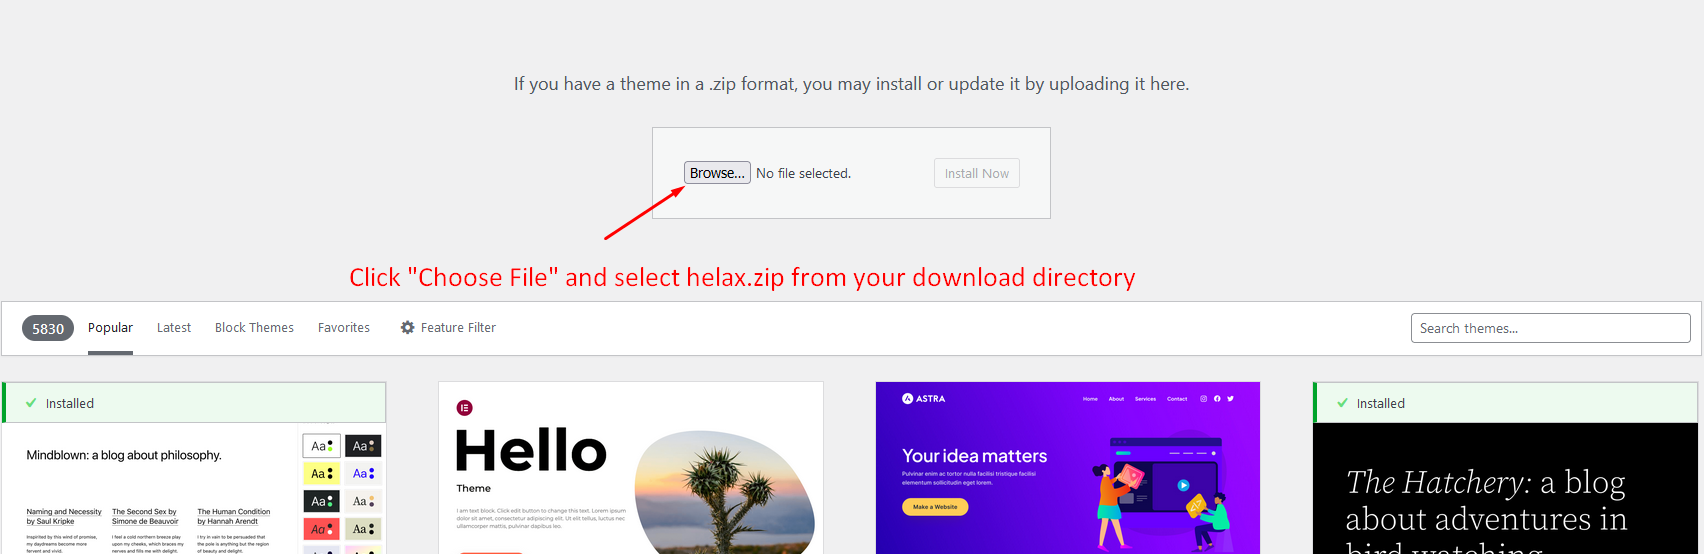
- After slelct"ovix.zip" from your computer Click on "Install Now" button.
- Wait the theme being uploaded and installed.
- To activate the theme: Go to Appearance > Themes hover over the theme and and click Activate.
Install theme via FTP.
Follow the steps below to install theme via FTP.
- Log into your hosting space via an FTP software
- Unzip the ovix.zip file and ONLY use the extracted ovix theme folder
- Upload the extracted ovix theme folder into wp-content > themes folder
- To activate the theme: Go to Appearance > Themes hover over the theme and and click Activate.
Common Install Error: Are You Sure You Want To Do This?
The “Are You Sure You Want To Do This” message may occur, means that you are limited in upload file size. Consider install the theme via FTP if this happens, or contact your hosting provider and ask them to increase the limited size.Install required plugins
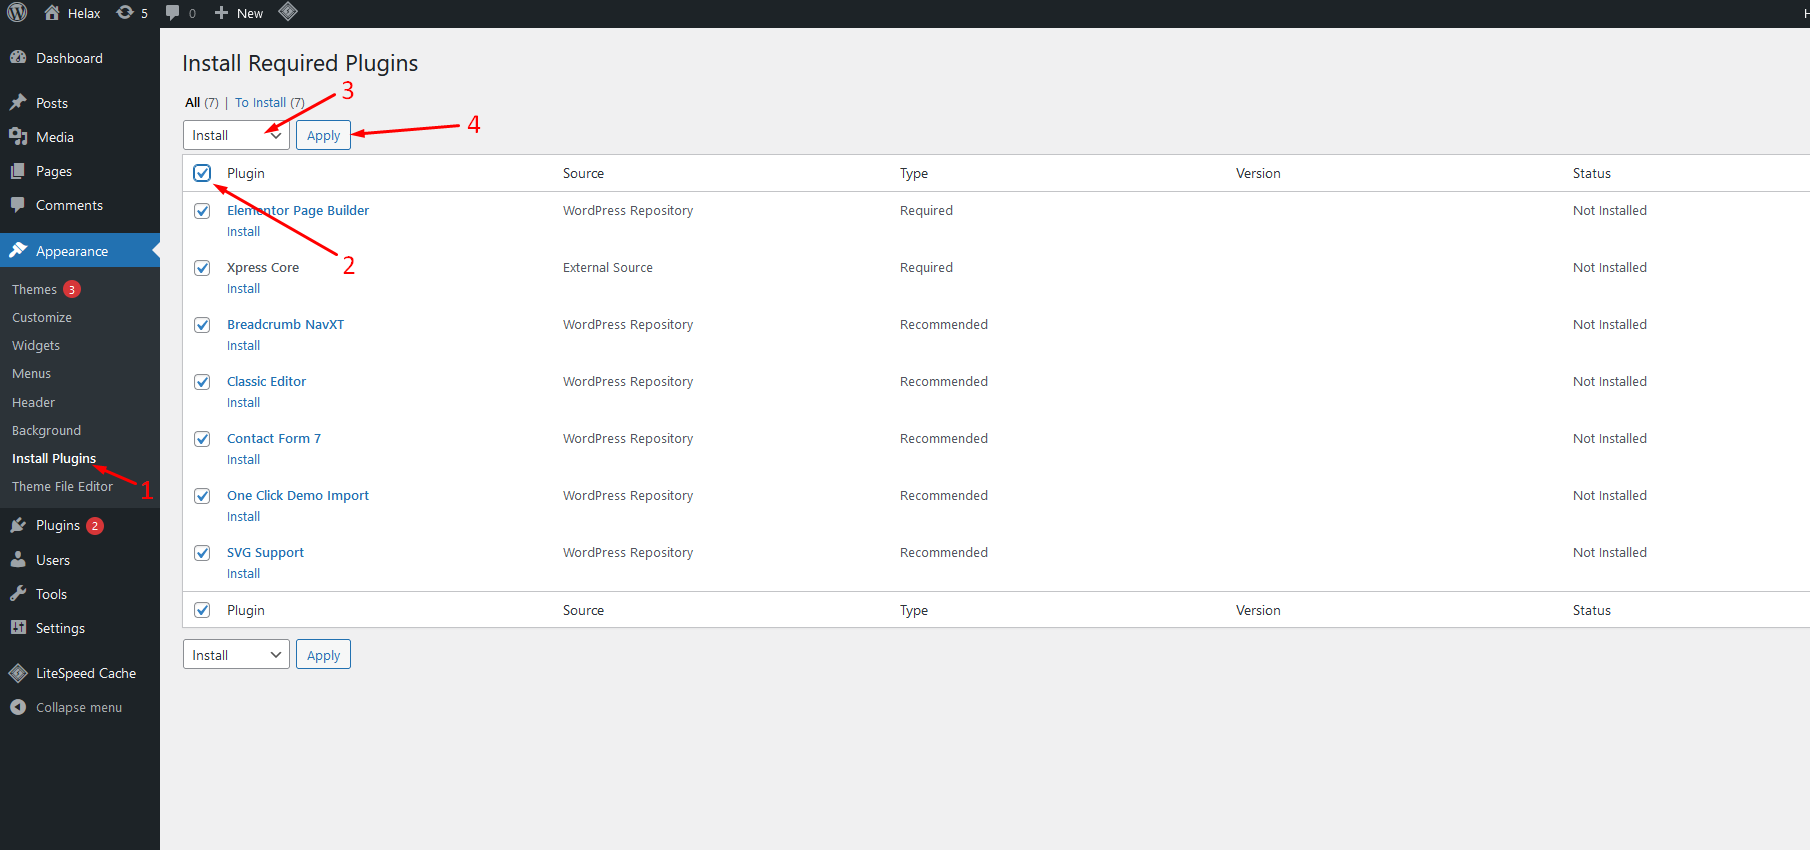
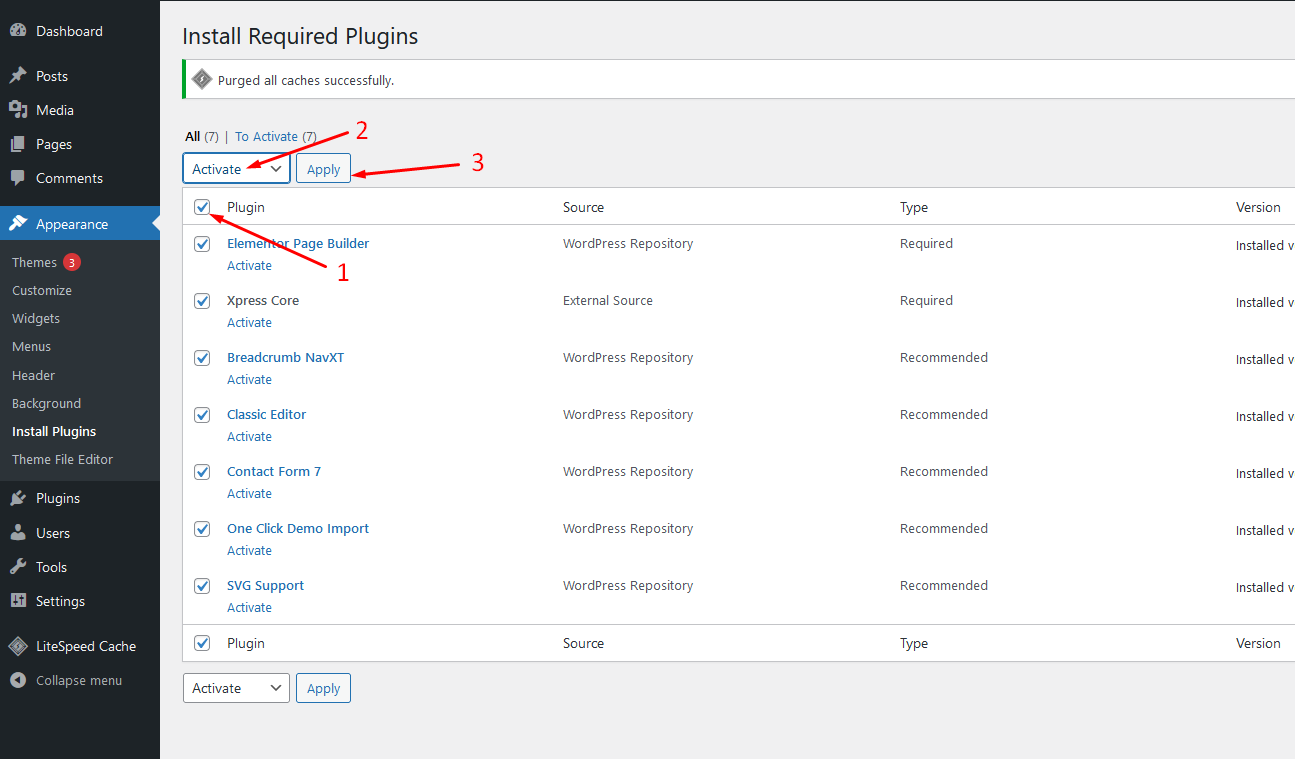
Once you activated Ovix theme than You will get a notice for installing required plugins.
- Click on " Appearance -> Install Plugins" to install required plugins.
- Select all required plugin, From the top dropdown menu select Install and click Apply.
- After Install all plugins sucessfully click Return to Required Plugins Installer.

- Select all required plugin, From the top dropdown menu select Activete and click Apply.
Import demo data
Import Demo Data – Now users can quickly and easily import our demo content with only one click to the button. This is the preferred method because it's the fastest and easiest way to get our demo content. It will import all our pages, posts, sliders etc.. If you wish to use our One Click Demo Content Importer, please see the guide below.
-
For import demo data go on Appearance > Import demo Data.
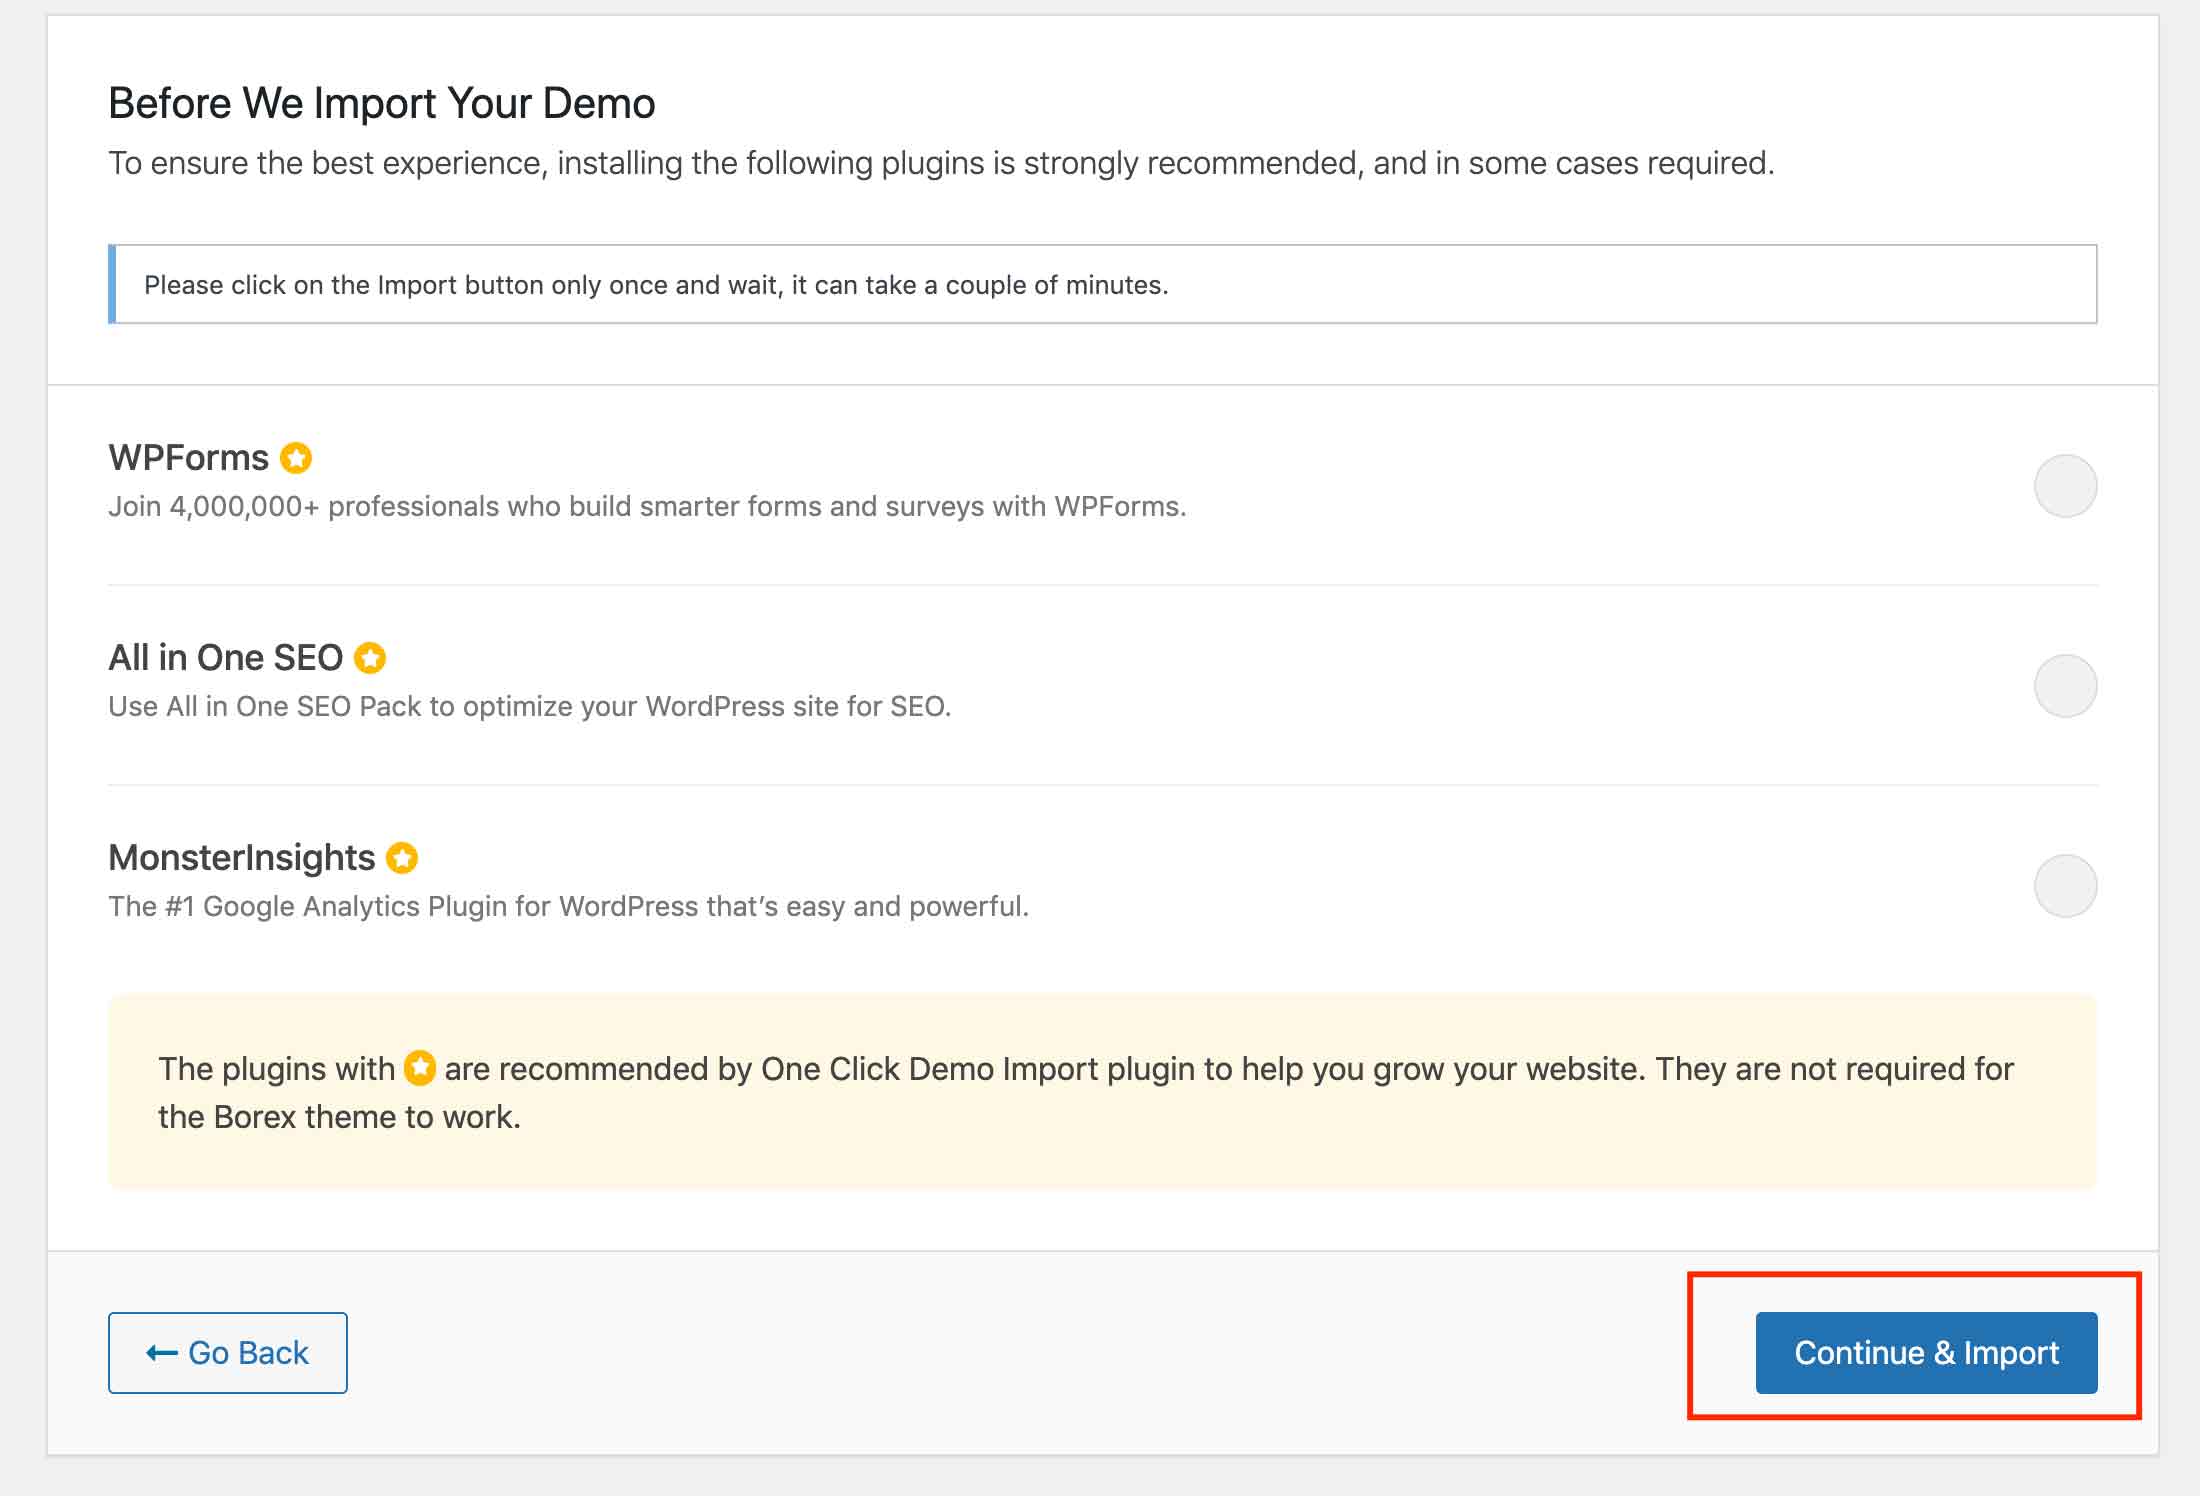
You will see import demo data import screen.Click on import Demo DataButton.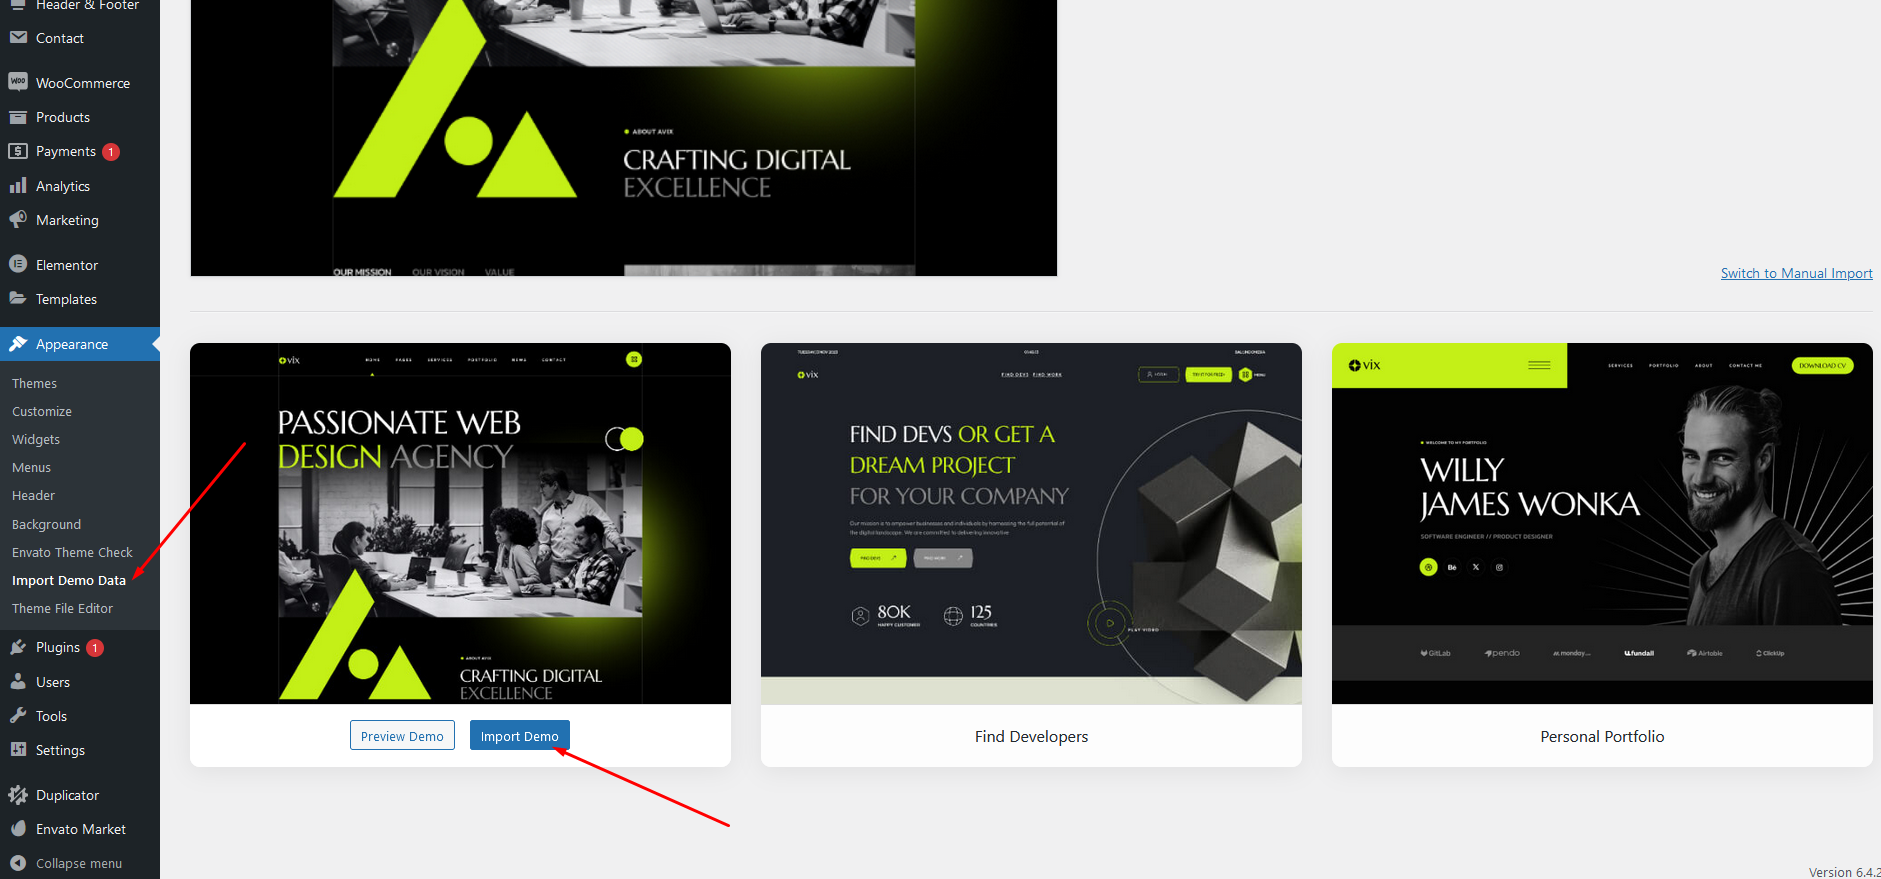
- Click on Continue & import Button.
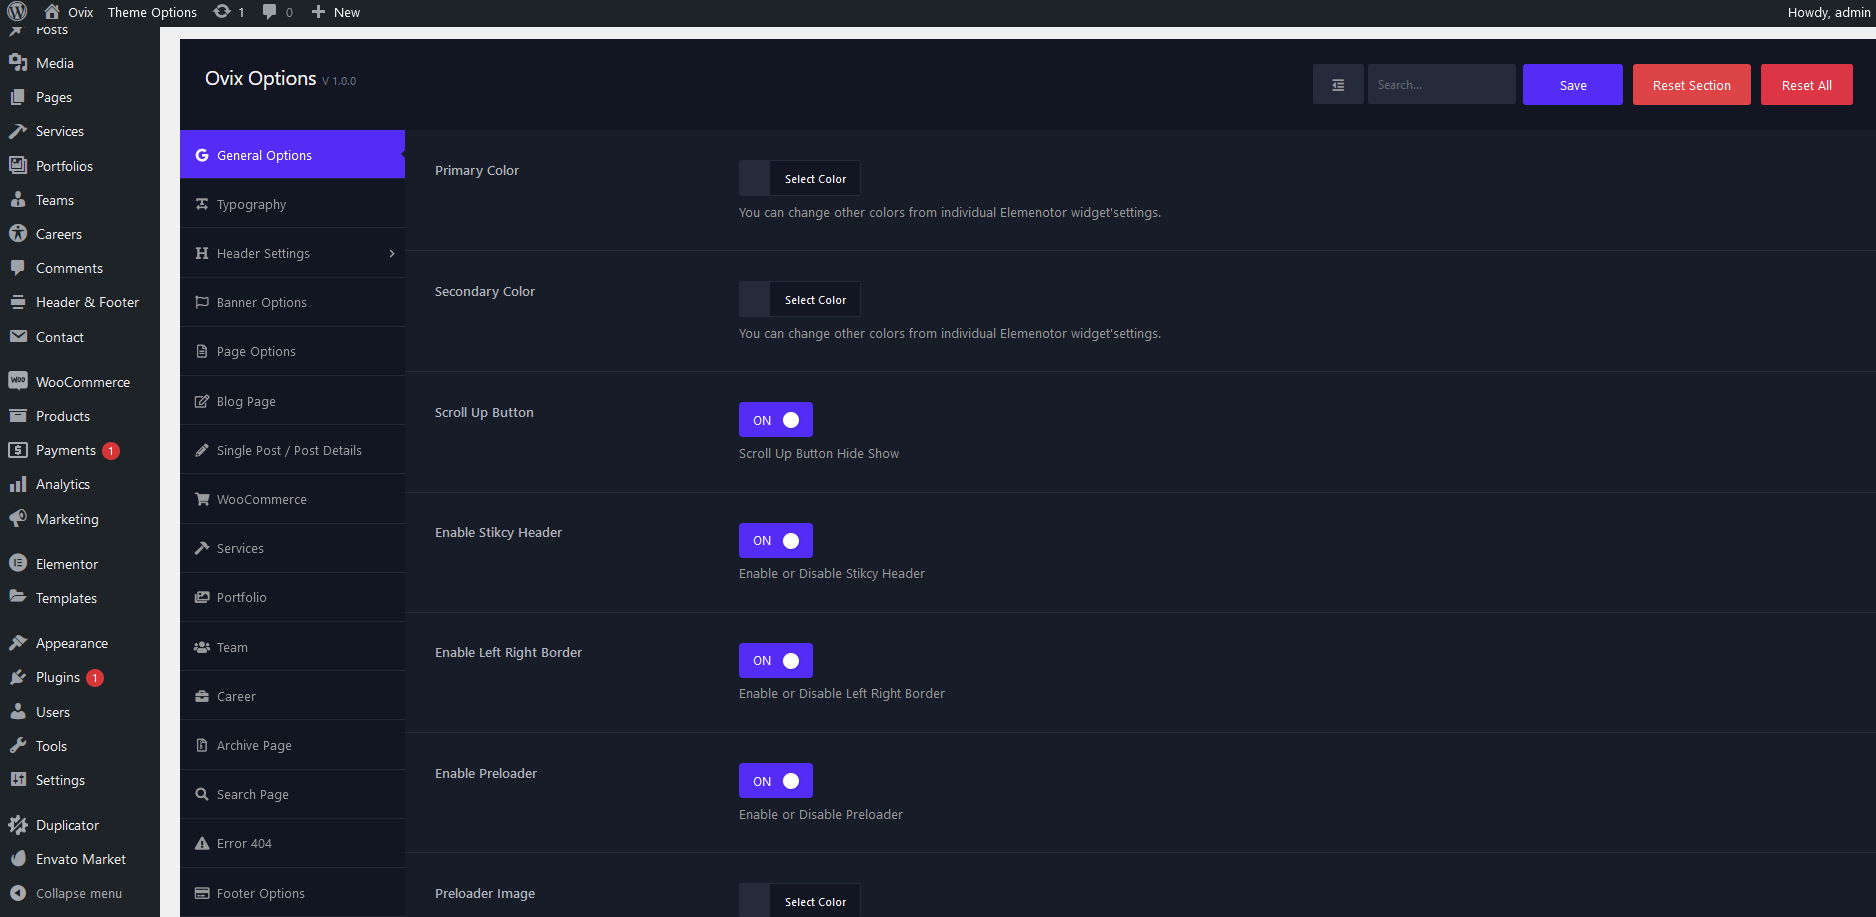
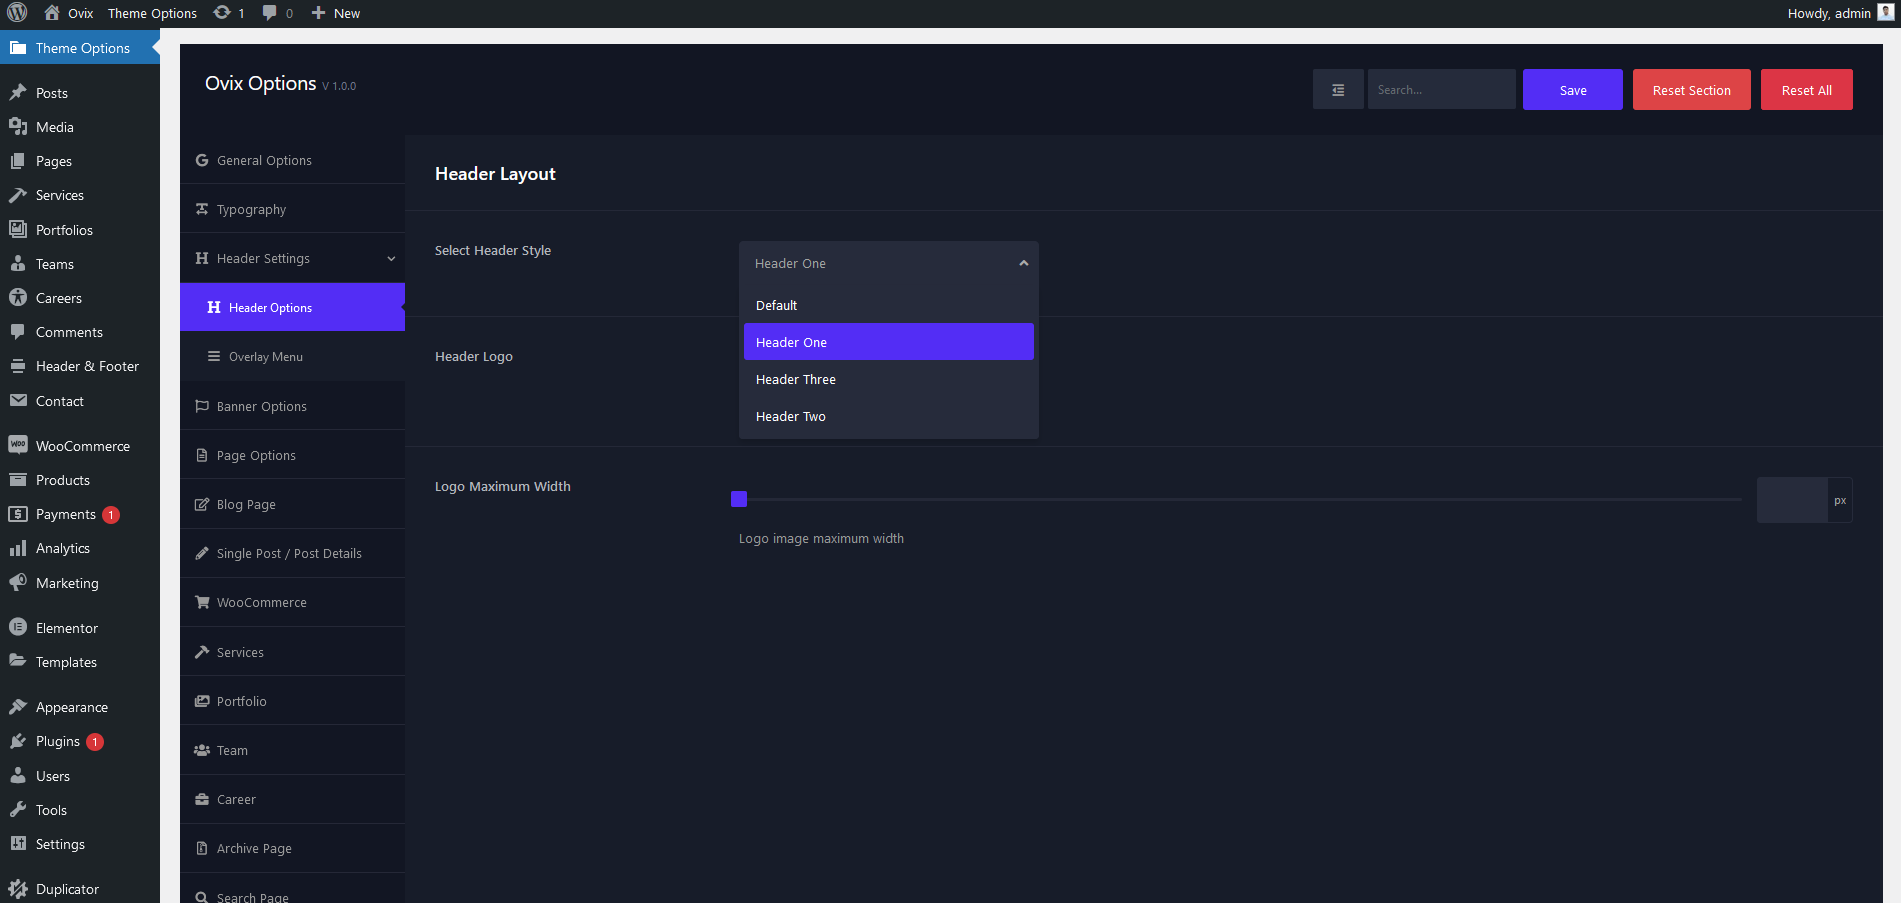
Theme options
Using theme options, you can control every setting on the theme. Let’s start learning theme options. Go to Ovix > Theme Options
General Options
- Primary Color : — Select theme primary color
- Secondary Color : — Select theme secondary color
- Scroll Up Button : — Enable or disable Scroll Up Button
- Enable Preloader : — Enable or disable preloader
- Enable Stikcy Header : — Enable or disable Stikcy Header
- Enable Left Right Border : — Enable or disable Left Right Border
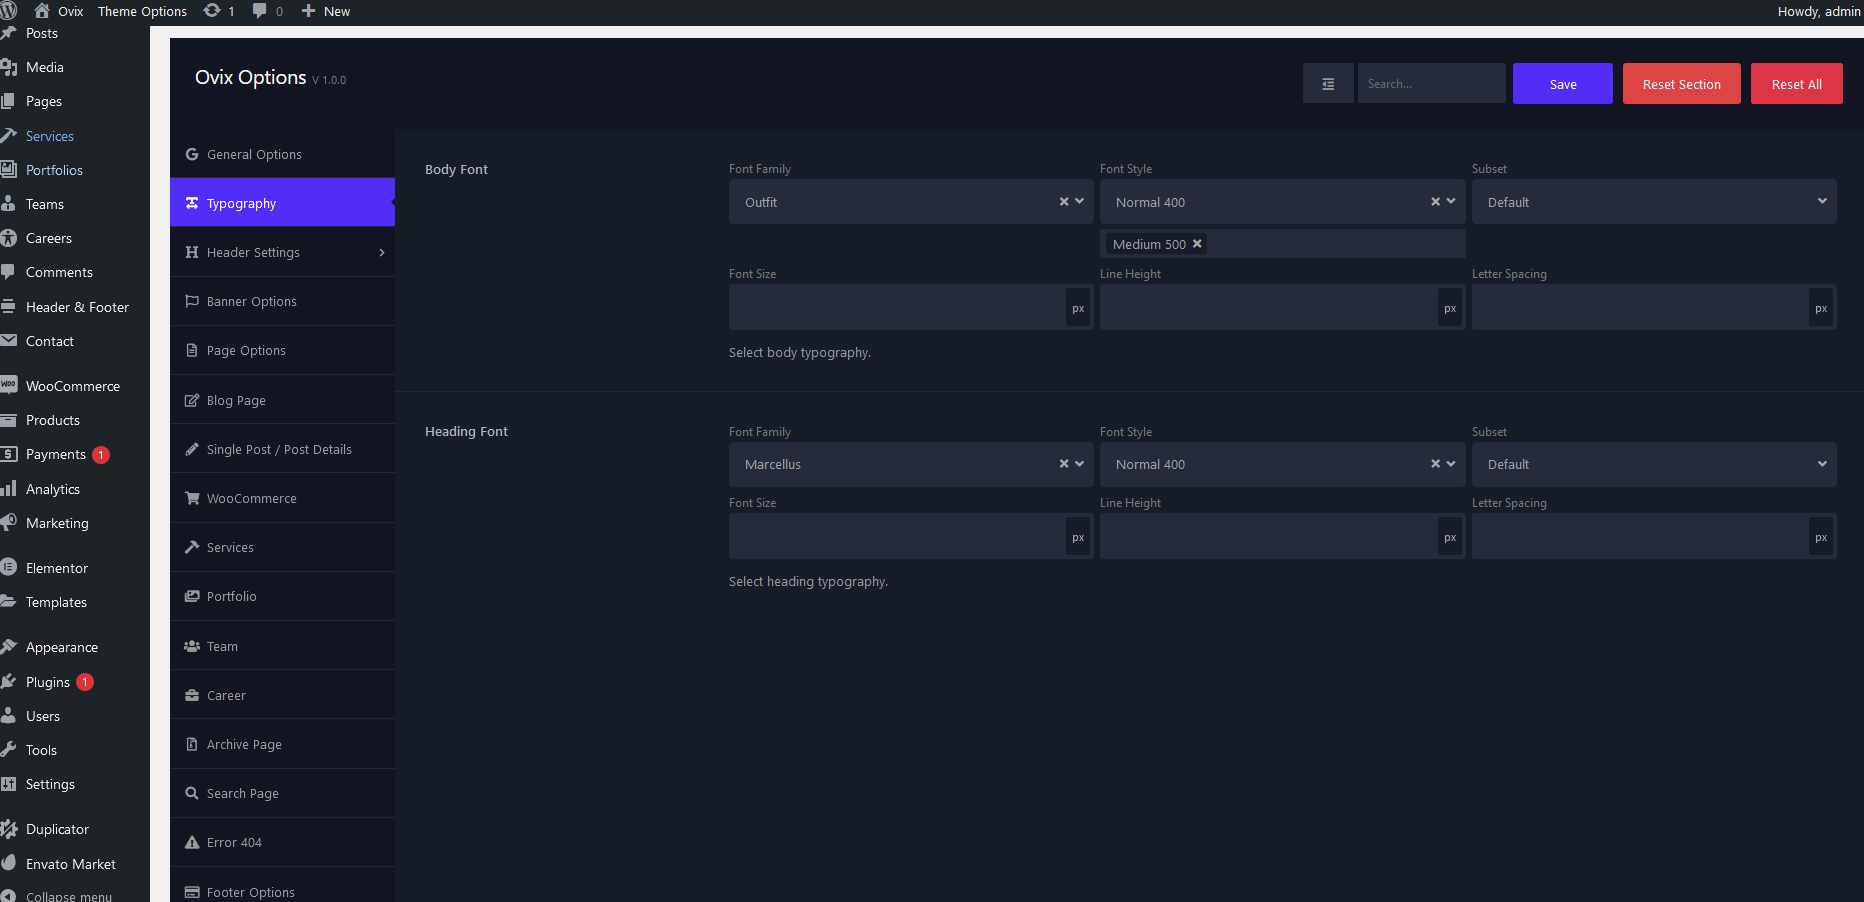
Typography
You can change theme typography from here
- Body Font: — Change body Font, Font weight, Font style, Font-size from here.
- h1,h2, h3, h4, h5, h6 Font: — Change h1,h2, h3, h4, h5, h6 Font, Font weight, Font style, Font size from thes options.
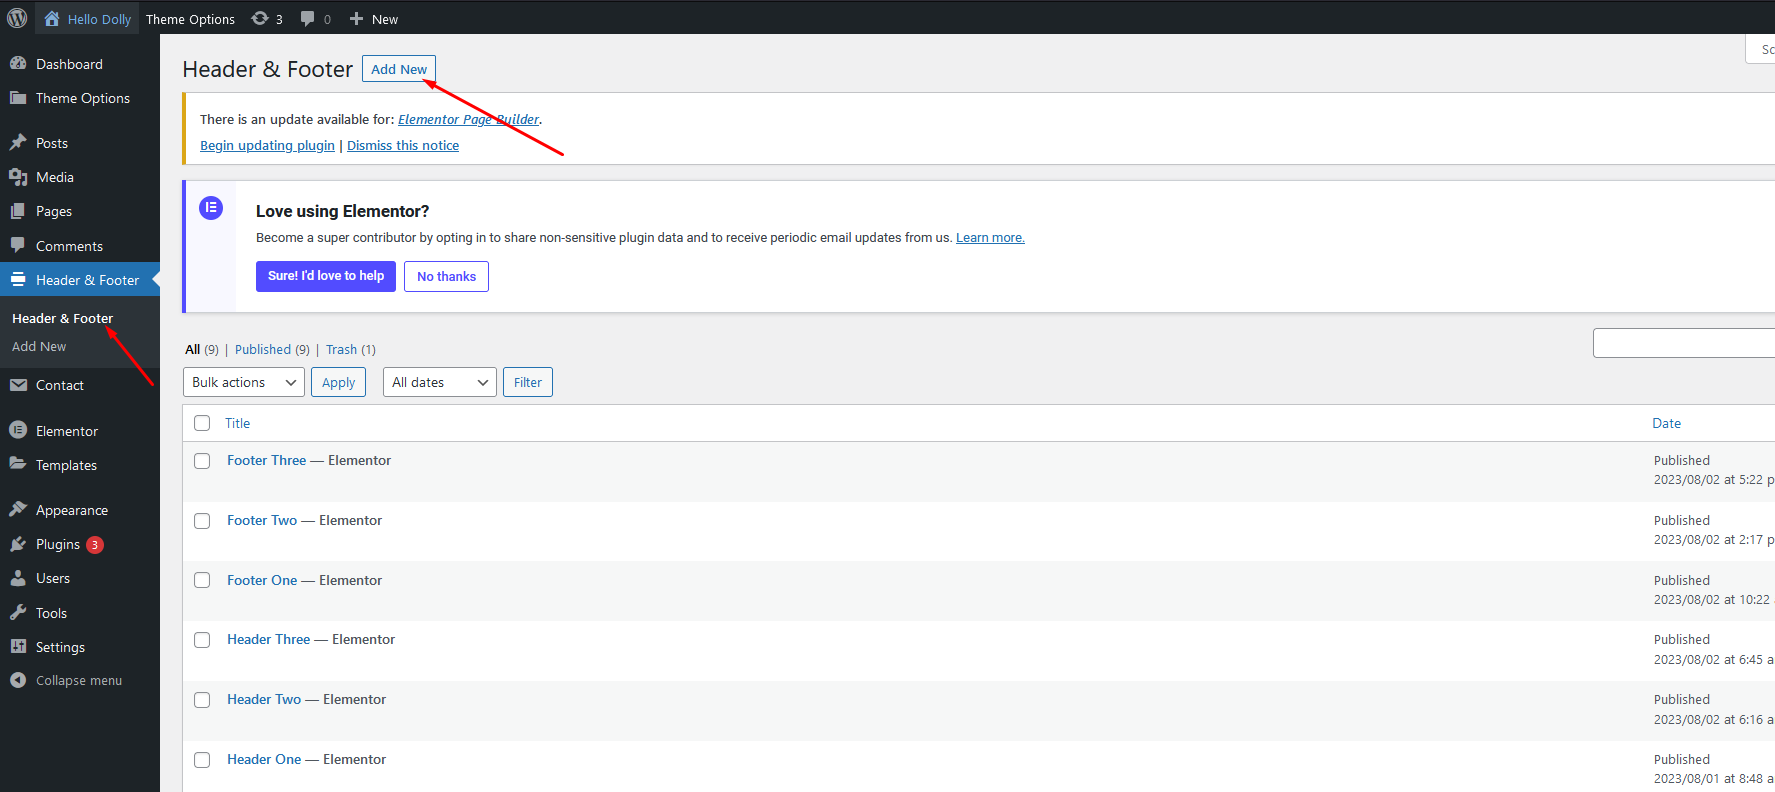
Header & Footer
How to create Header Layout
-
Got to Header & Footer > Add New
-
Give your Header name and you need to choose the type for the template as Header
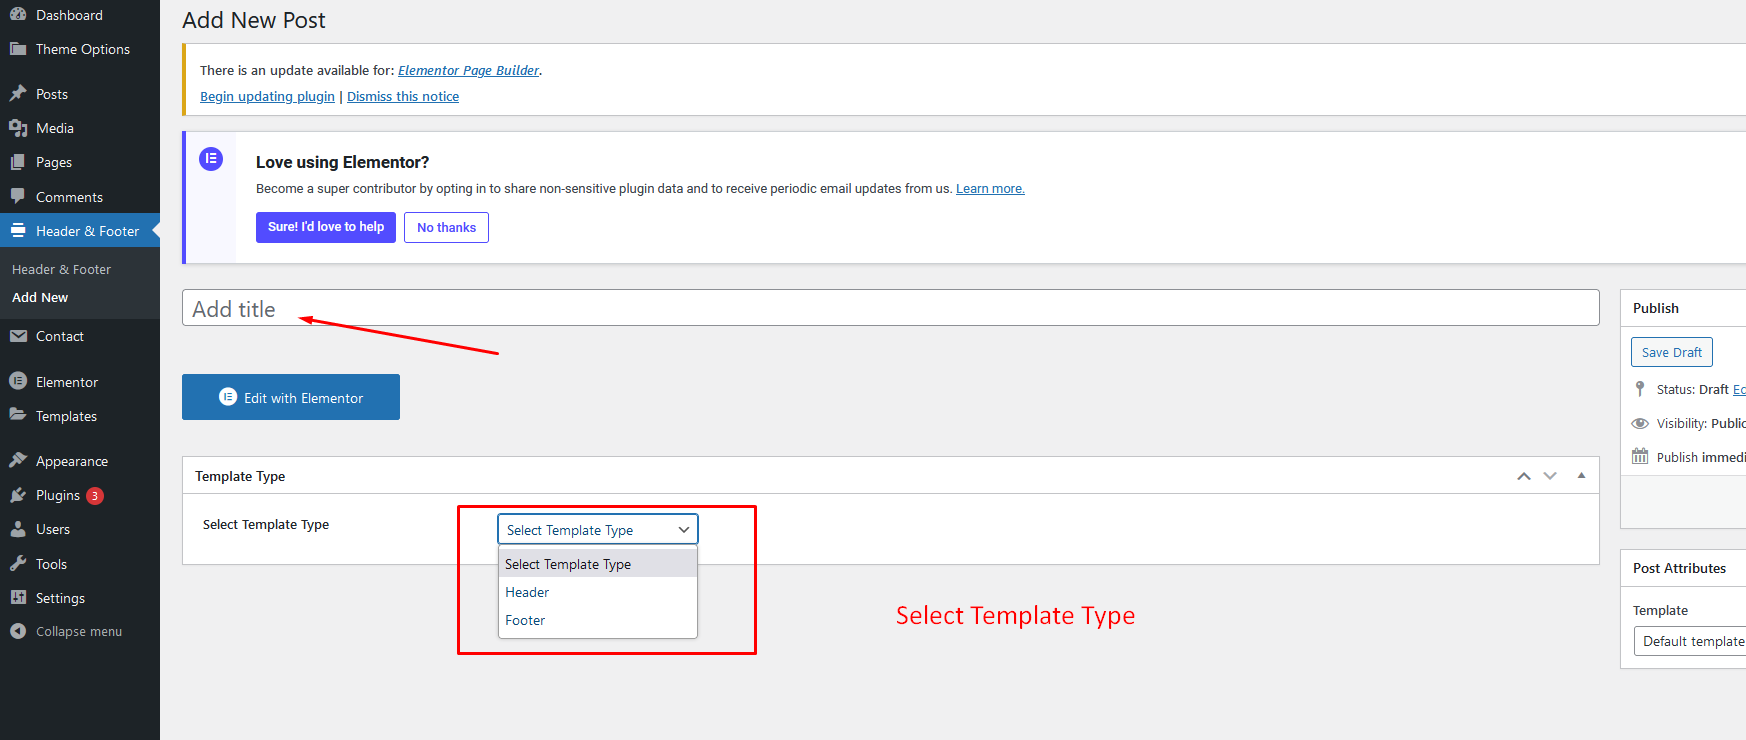
-
Select Which Page you want to display Header
-
If you Want to Display Diffrent Page Diffrent Header Then Follow this please
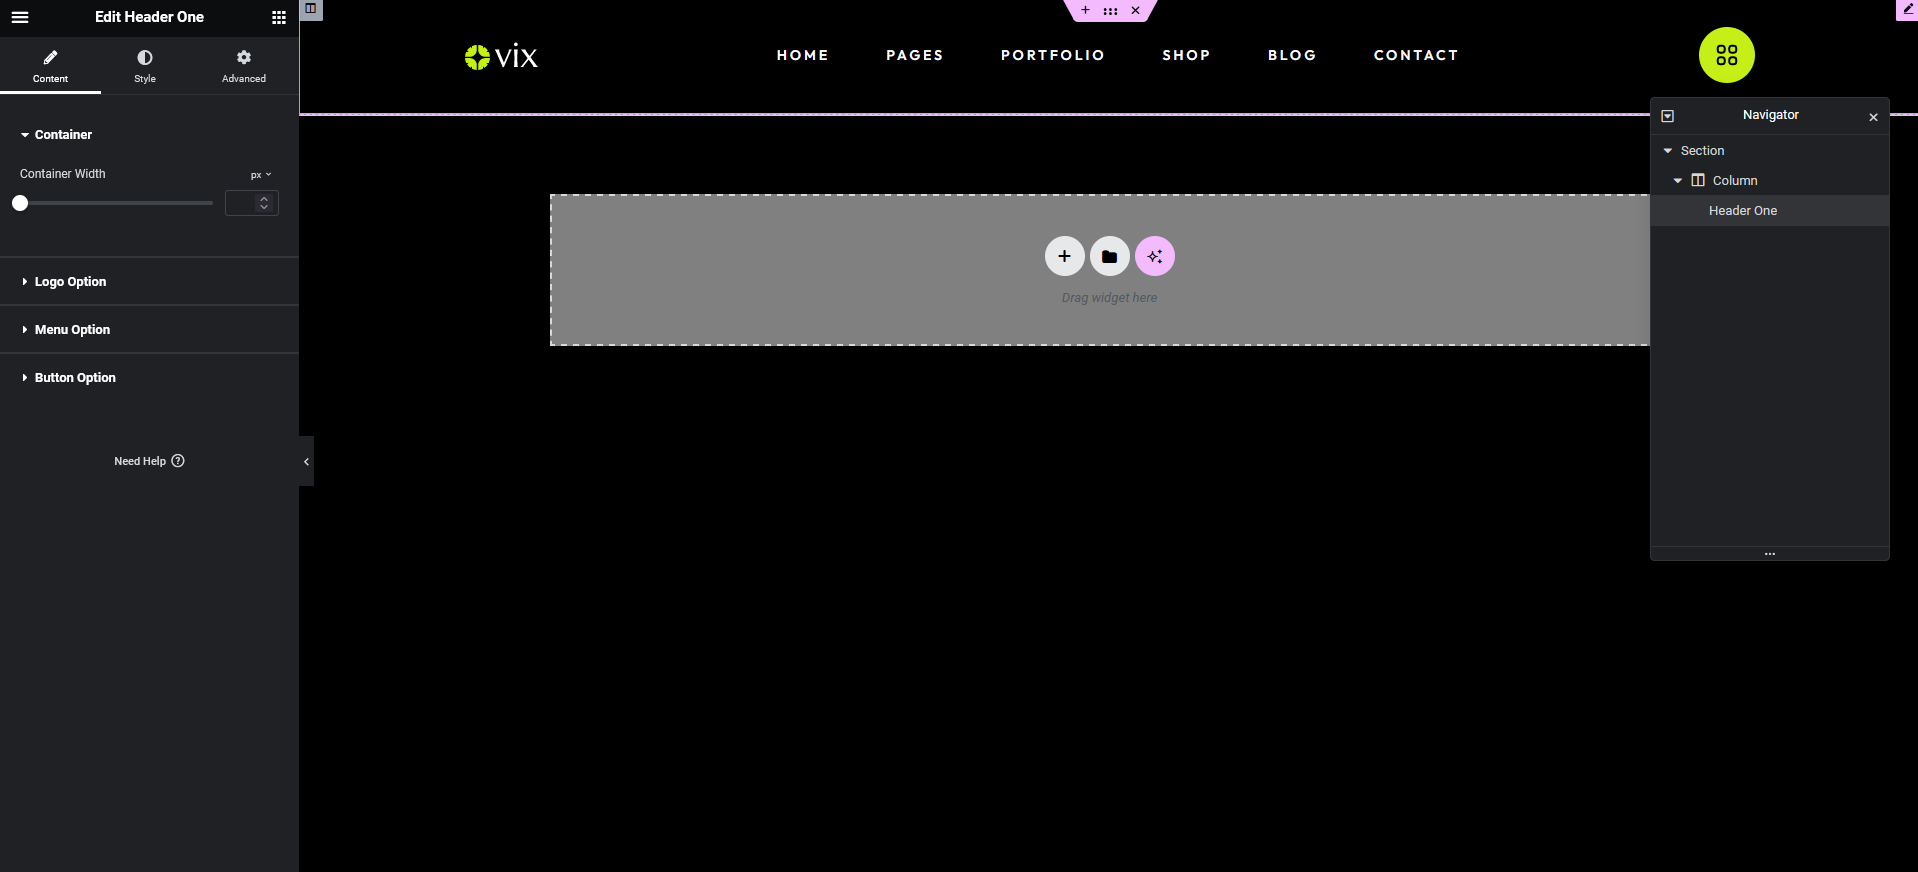
How to Edit Header Layout
-
Got to Header & Footer And chssoe any header and last click edit with elementor
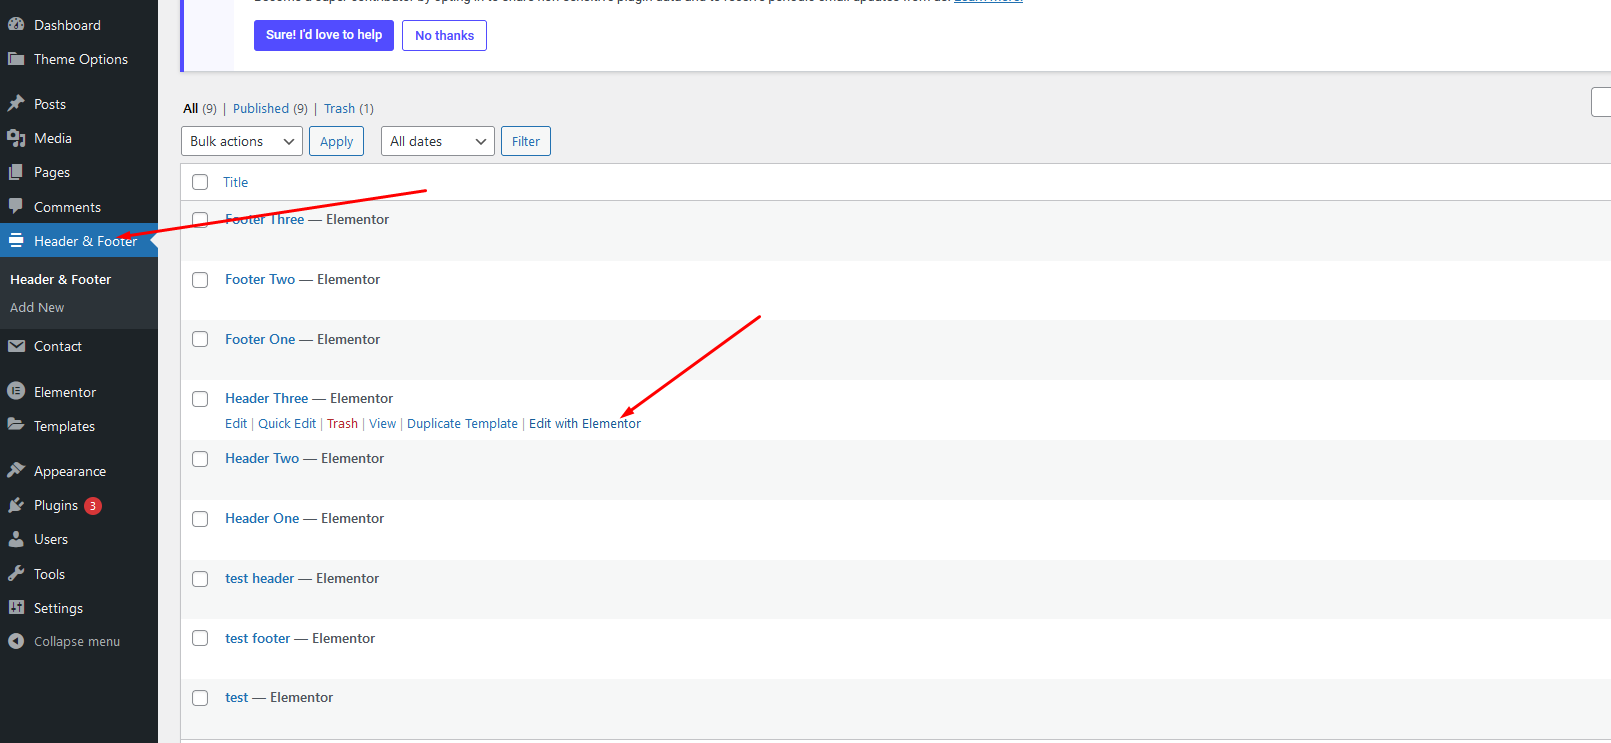
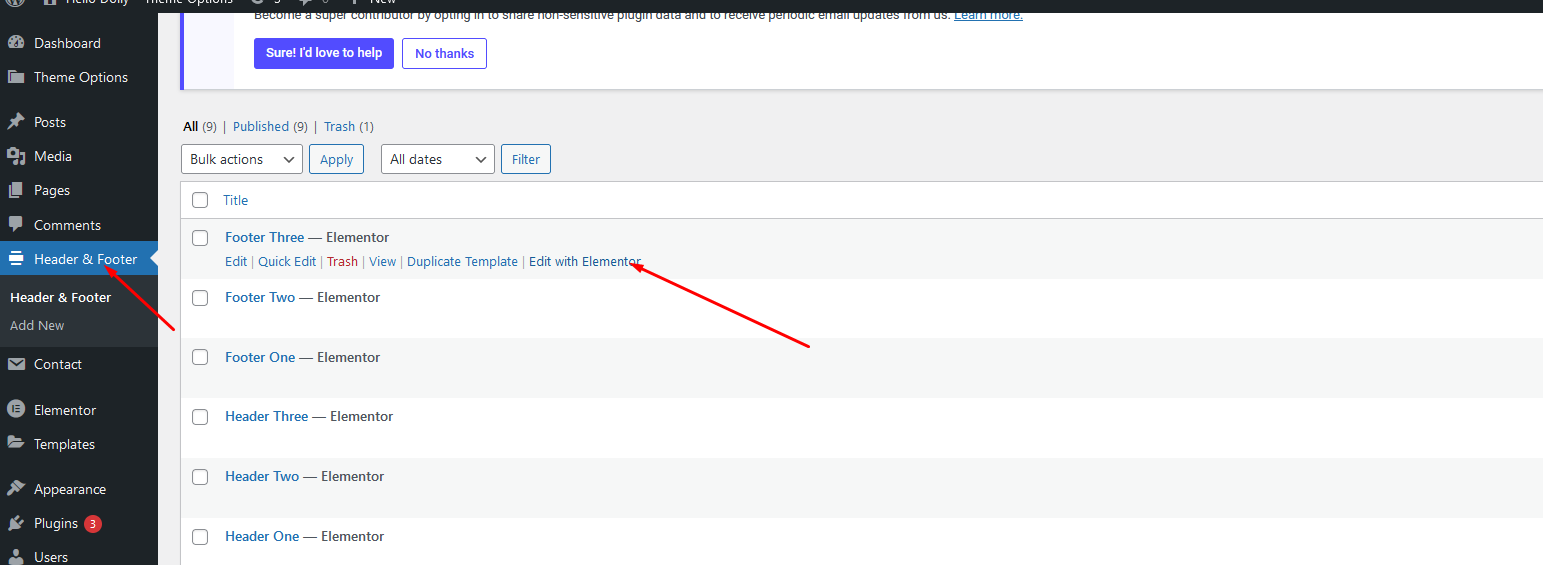
How to Edit Footer Layout
-
Got to Header & Footer And chssoe any Footer and last click edit with elementor
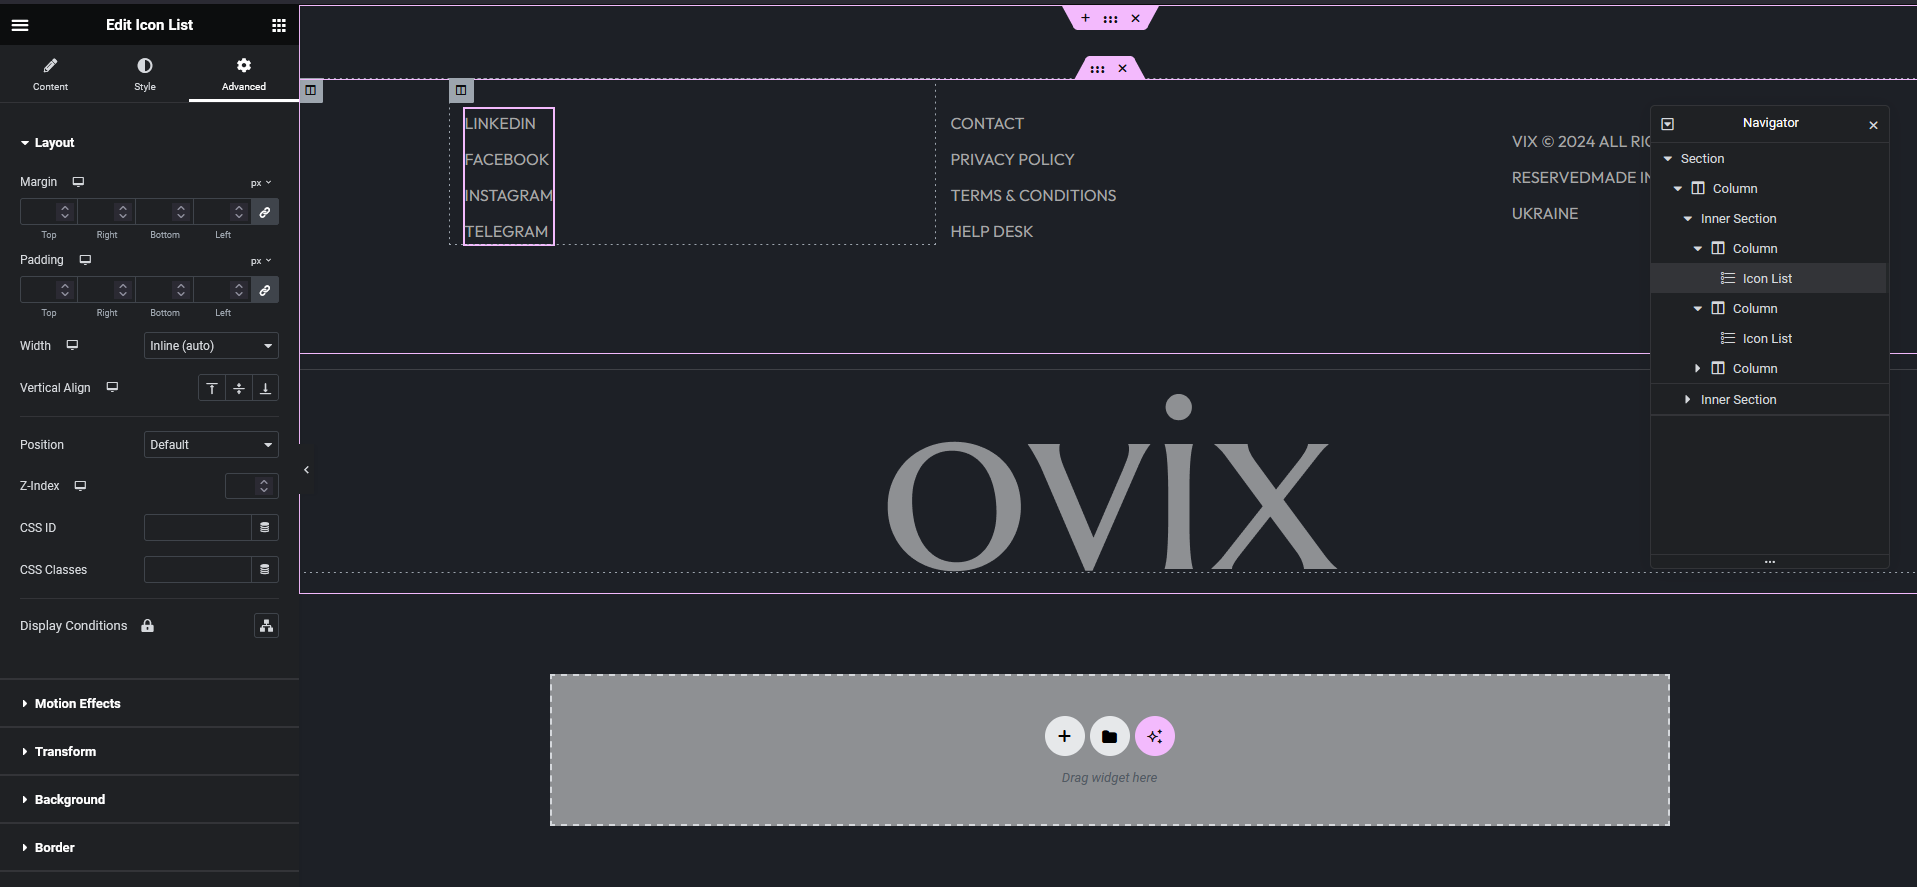
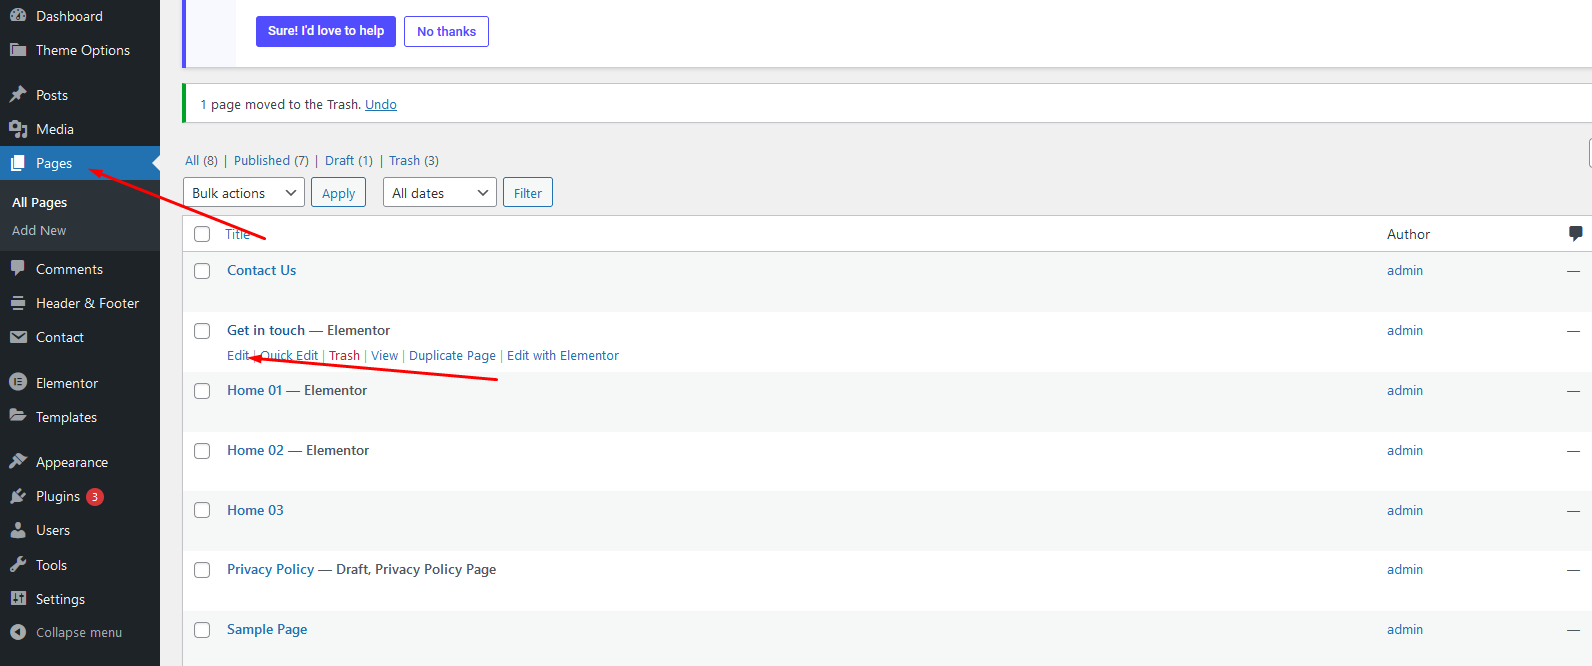
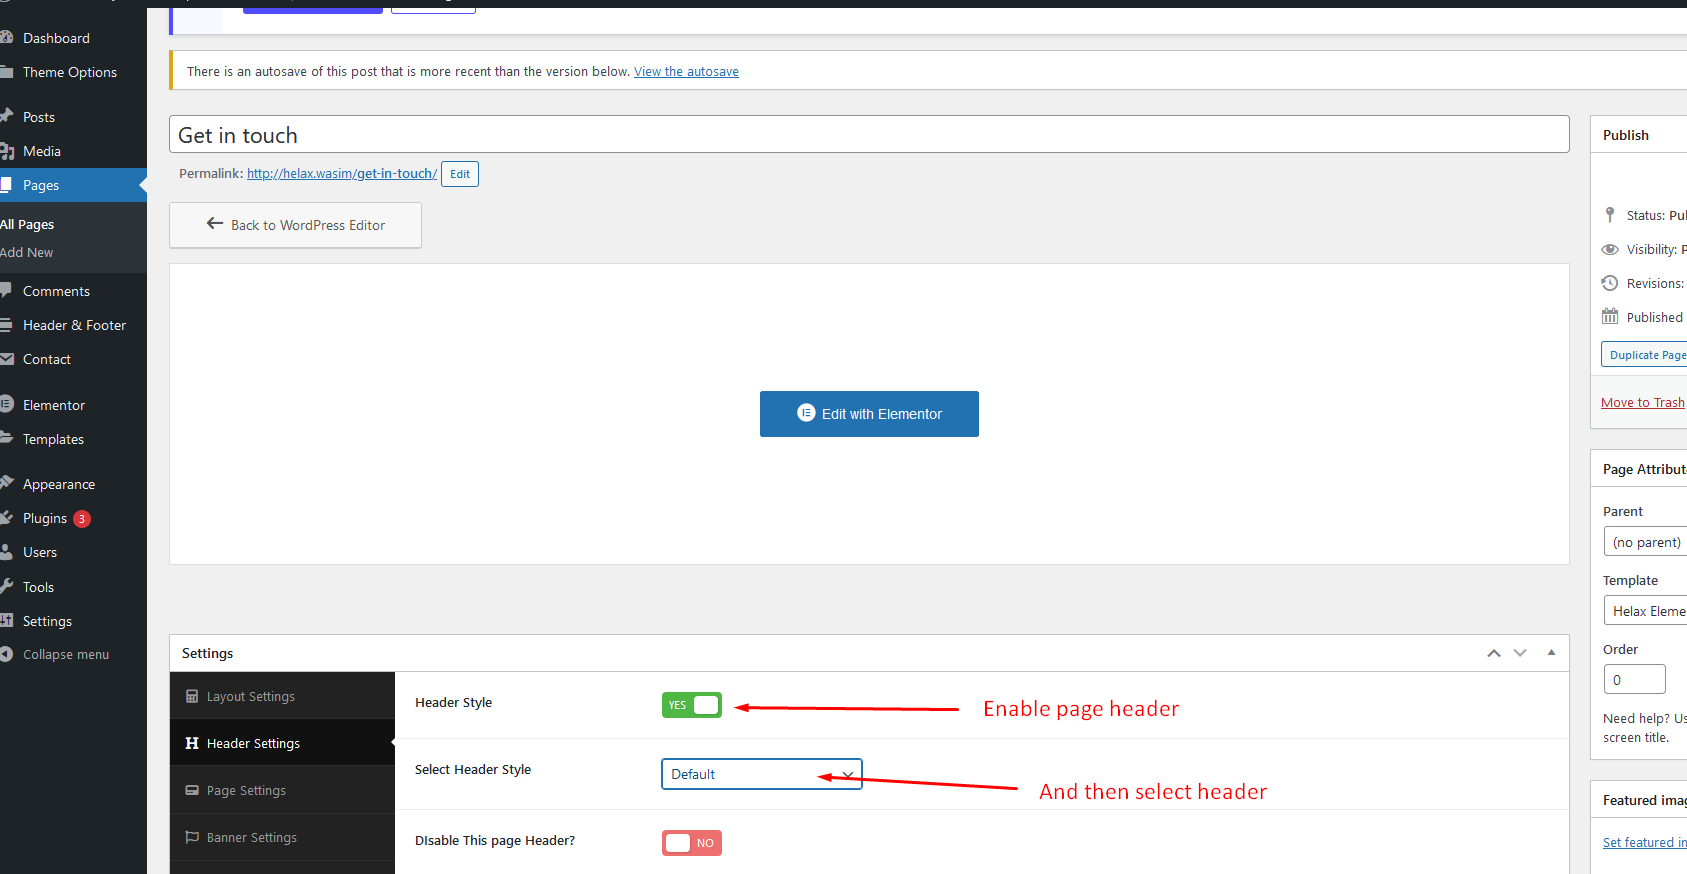
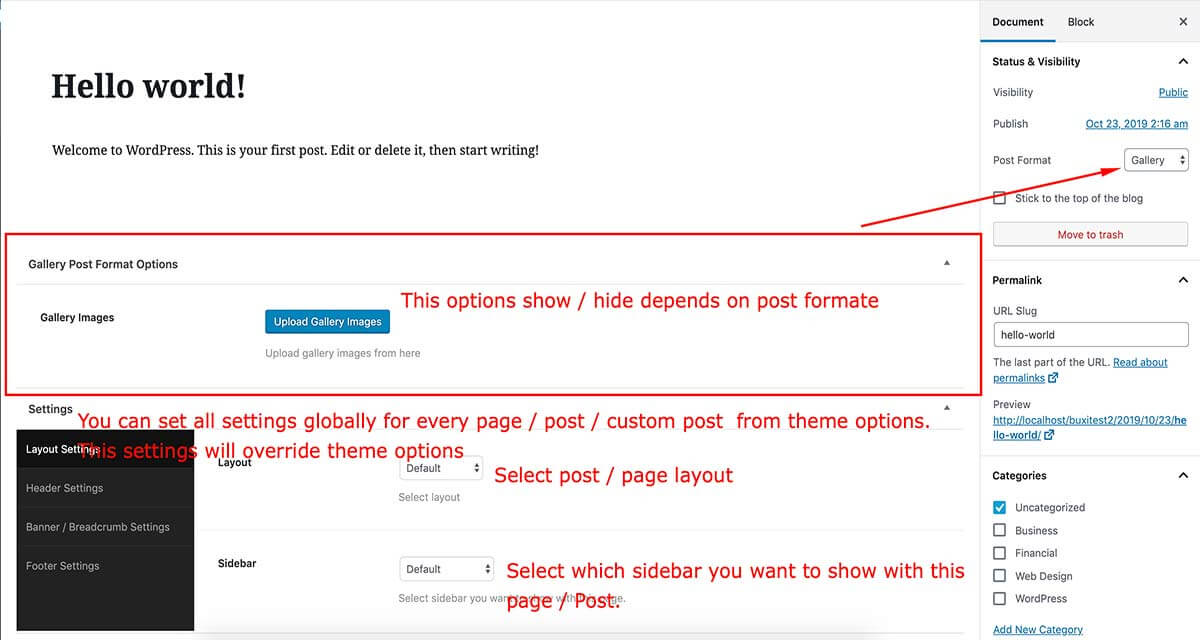
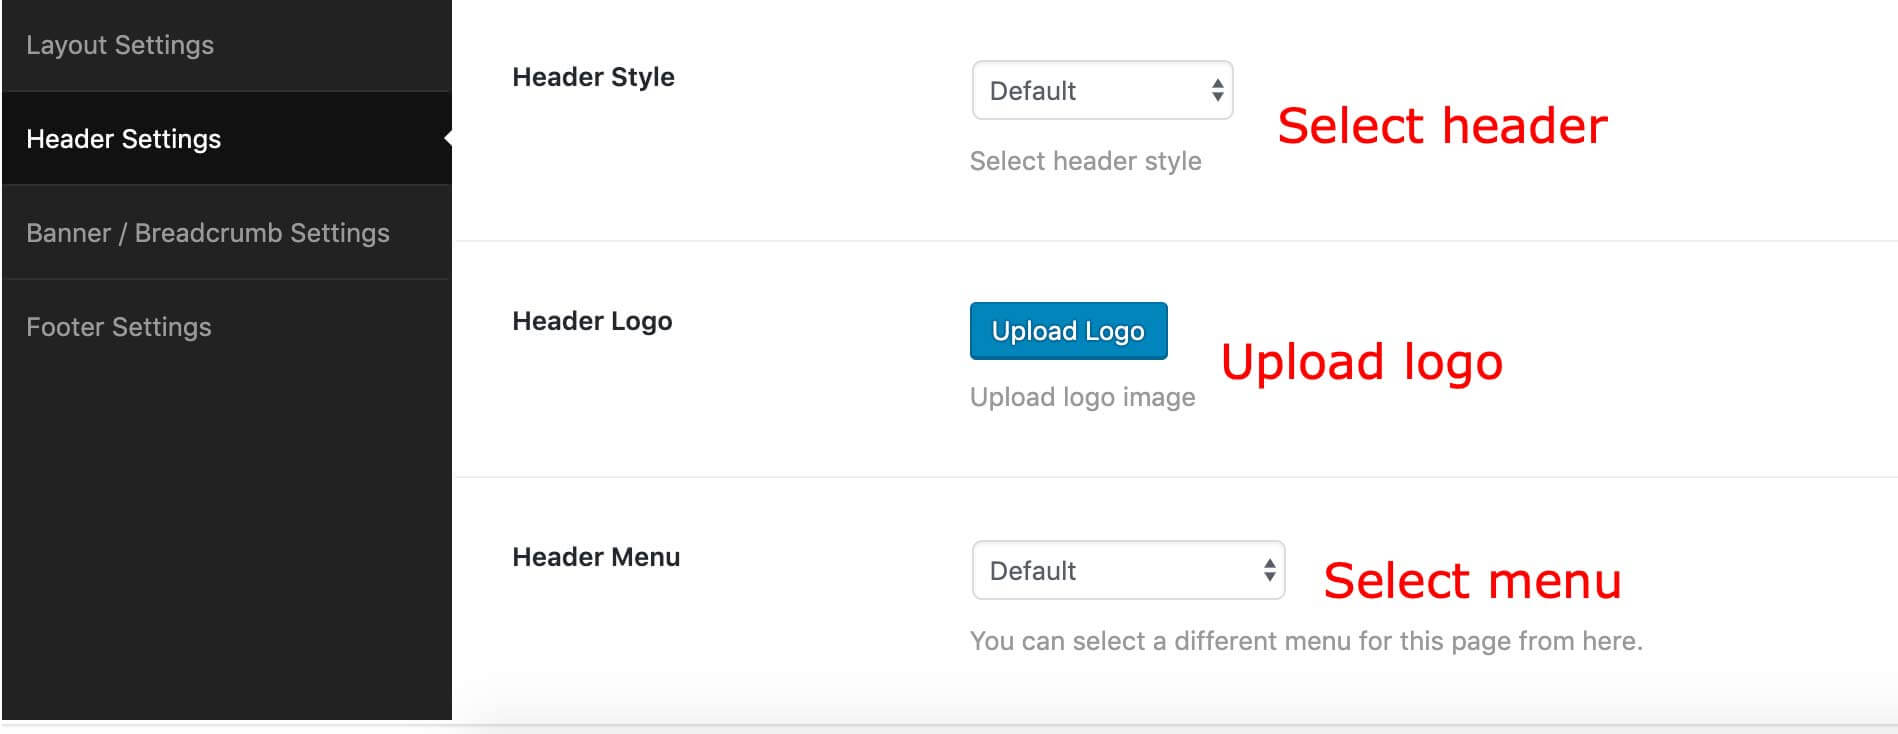
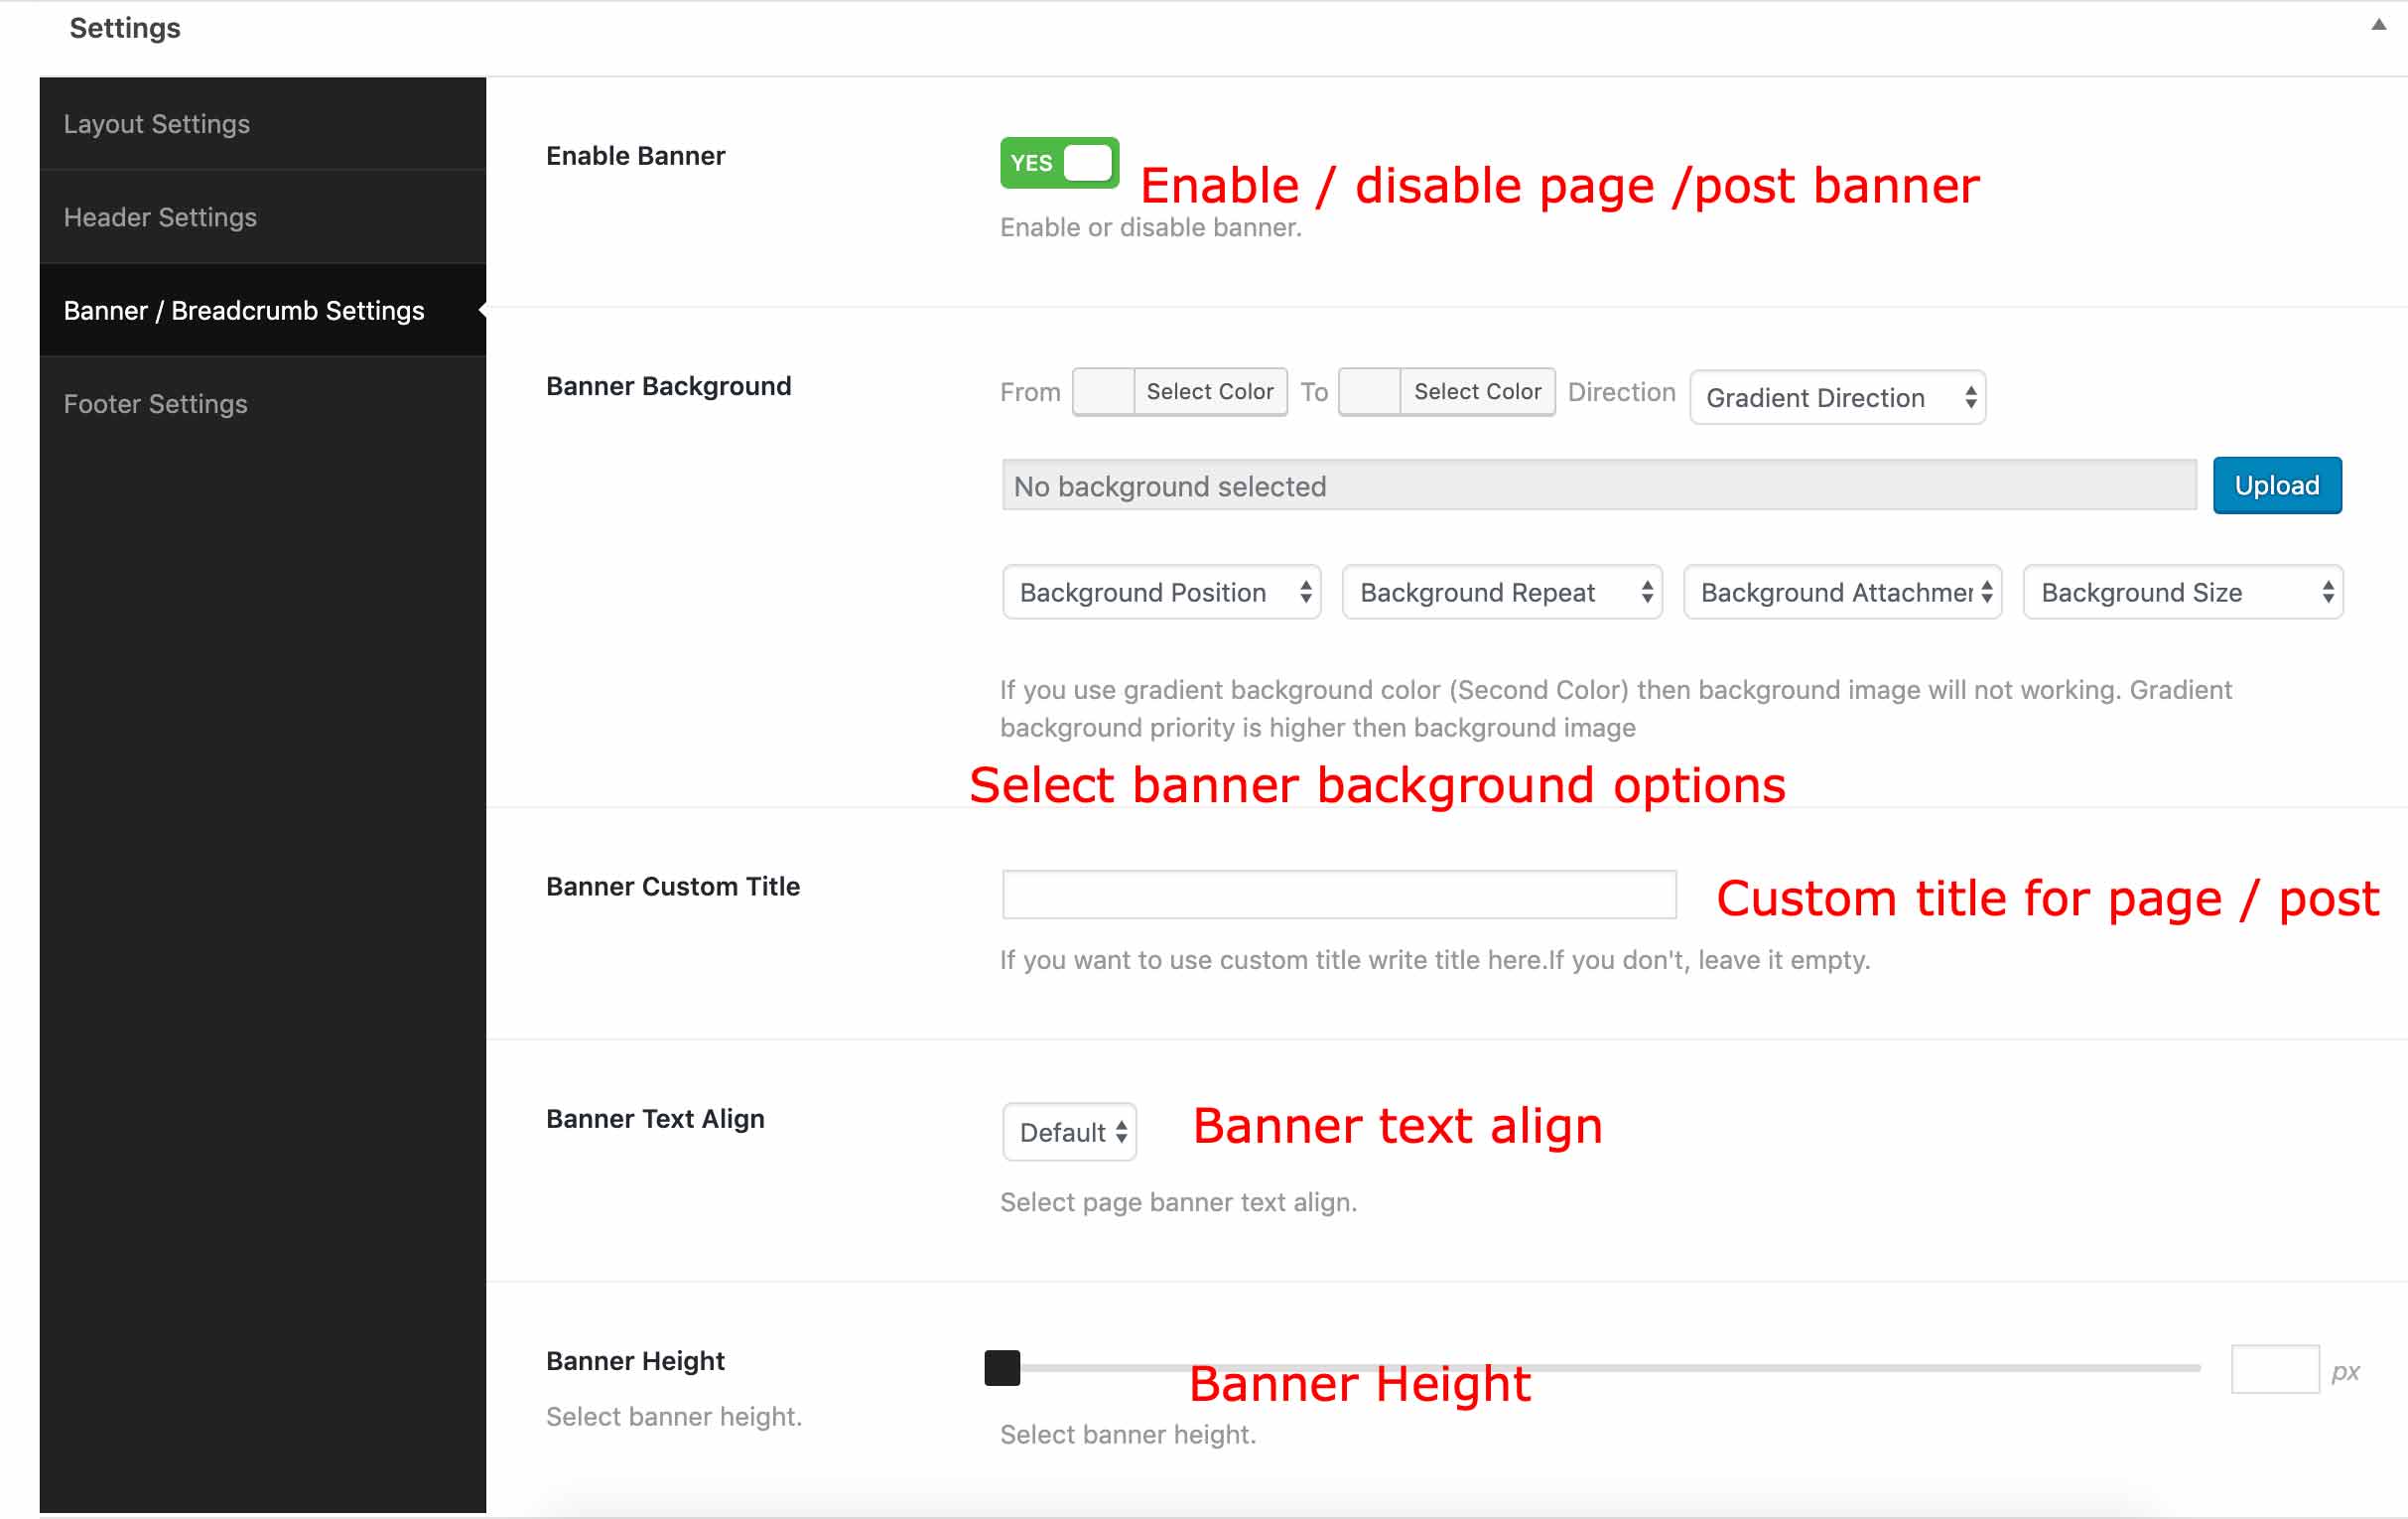
Page / Post / Custom post Settings
When you create or edit a page or post you will see few options for page or post settings on page/post bottom. You can change page/post layout, Header, Footer , hide /show banner, change banner title, images from these metabox options

Custom Widget / Sidebar Widgets
This theme provide three custom widget. To add this widget navigate to "Appearance > Widgets."
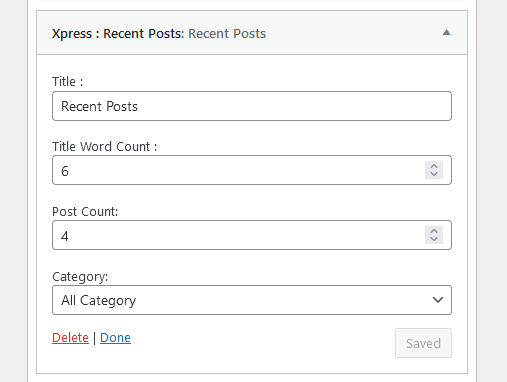
Ovix : Recent Posts Widget
- Title: — Type widget title here
- Title Word Count : — Type number of words you want to show from title. (useful for small width column )
- Post Count: — How many post you want to show.
- Category: — Select post category you want to show.
Theme Updates
There are 2 methods to update WordPress themes to the newer version. These new updates are essential if you want to have a bug free website as we give new features and improvements to the theme over time. Some of these updates might be needed in order to make the theme compatible with WordPress newer versions. There is no risk of losing your settings and pages (If you don't edited theme core files). However if you had done modifications in parent theme files, then they will be lost.
Please note that before updating a theme, we recommend you to make a backup of your modified files. Also, we recommend to deactivate its current version and then upload the zip file with new theme version then activate and update the theme.
Using FTP
- Login in to your Themeforest account and go to downloads (Dashboard > downloads)
- Download the theme into your computer
- Install an FTP program (Filezilla is free)
- Retrieve your FTP login information from your hosting admin panel and login into your hosting via FTP
- Unzip the item main file
- Locate the ovix.zip file and unzip it. Make sure your unzipping software does not create an extra directory with the same name nested into each other.
- Drag and drop theme main folder into your FTP program with the destination: “YOUR_HOSTING_ROOT/YOUR_SUBDIRECTORY/wp-content/themes/”
- FTP program will give a warning that there is an existing with the same directory name, choose replace all.And wait until all files are replaced
Update Through WordPress Admin Panel
- Navigate to Appearance > Themes Activate another theme to deactivate the Ovix theme
- Delete the installed Ovix theme.
- Unzip the file you just downloaded from ThemeForest and locate the WordPress Theme ovix.zip
- Still within the Themes section, on the header tab, click on “Install Themes” , then on the header second tab click “Upload” .
- Click “Browse…”and locate the new theme file ovix.zip
- The “Upgrade existing theme?” option choose “Yes” from the dropdown list.
- Click “Install Now”.
- Click “Activate”.
Support / Contact With Us
- Please go to support@xpressbuddy.com
Update History
                    ----- 1.0.0 ( 31 January 2024) -----
                    Initial released